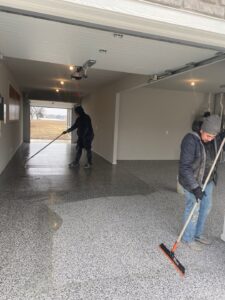
Why Floor Preparation Matters
Concrete floors, while strong, have a naturally porous surface that can accumulate dirt, oils, and other contaminants over time. Without proper preparation, these impurities can prevent the Polyurea coating from bonding effectively to the concrete and result in peeling, bubbling, or early wear. Surface preparation also “opens up” the concrete, creating the right profile (or texture) for the coating to adhere securely.
Prepping a Concrete Floor for Polyurea Coating – Step by Step
Step 1: Surface Profiling
The first and most critical step is profiling the concrete floor. This involves removing the top layer of the concrete to expose its porosity. High-end equipment is key in this stage. For example, a Lavina 30-inch propane grinder, weighing approximately 750 pounds, is commonly used for this purpose. The weight ensures strong downward pressure, enabling the grinder to work deeply into the surface and create an optimal texture.
Combined with diamond tooling, the grinder abrades the concrete, etching it to the correct level for the Polyurea coating to bond. The profiling process doesn’t just smooth uneven patches but also opens up the pores of the concrete, which significantly enhances adhesion.
Step 2: Dust Collection
Grinding concrete can produce a significant amount of fine dust, which if left unmanaged, can present cleanup problems and potentially impact the coating process. During surface preparation, premium grinders and handheld tools are typically connected to a triple HEPA-filtered vacuum system. This advanced system captures approximately 90% of airborne dust, maintaining a clean environment throughout the process.
This dust management system is particularly beneficial when working in residential or commercial spaces where clients appreciate minimal mess.
Step 3: Cleaning and Final Touch-Ups
Even with a high-end vacuum system, some dust, debris, and chips may remain on the floor after grinding. These leftovers are removed by thorough vacuuming, ensuring the surface is absolutely clean.
Paying attention to detail during this step is essential. Dust, debris, or any contamination left on the floor can interfere with the coating’s adhesion. A clean, prepared surface sets the stage for the Polyurea coating to perform at its best.
Step 4: Inspection and Final Preparation
Once the floor has been vacuumed, an inspection is conducted to ensure it meets all preparation standards. The texture is checked to confirm the proper level of profiling has been achieved, and any missed spots or imperfections are addressed. A completely clean and uniformly prepared concrete floor is now ready for the Polyurea coating application.
Why Professional Tools and Expertise Matter
The tools and equipment used for floor preparation can make a significant difference in the outcome. For example:
- The Lavina grinder combines weight and precision to achieve consistent profiling across the surface.
- Diamond tooling ensures the concrete is etched evenly without gouging or damaging the floor.
- A HEPA-filtered vacuum system keeps the workspace clean and dramatically reduces airborne dust particles, making the process safer and more efficient.
Without professional-grade tools and expertise, the preparation process can fall short, leading to potential coating failure. Investing in proper preparation is non-negotiable for long-term results.
A Clean and Effective Process
The bottom line? Effective surface preparation isn’t just a task—it’s the foundation of a durable Polyurea-coated floor. With meticulous grinding, heavy-duty vacuuming, and a keen eye for detail, high-quality preparation ensures that your Polyurea coating achieves its maximum potential in terms of performance and longevity.
Taking the time to properly prepare the surface guarantees a clean, quick, and seamless coating process. The result? A flawless finish that lasts for years to come.
Transform your concrete floors the right way—start with expert preparation, and trust the process for success every time.
